Problems with Pavers Over Concrete and How to Avoid Them
Pavers over concrete work only when the slab is sound, drains well, and leaves enough clearance. If it is cracked, heaved, or holds water, repair or full replacement is the better choice. Bad overlays can loosen, rock, stain, or trap moisture, which breaks the system. This guide explains the failure chain, a pre-install checklist, and how to choose the right installation method.
Why pavers fail over concrete
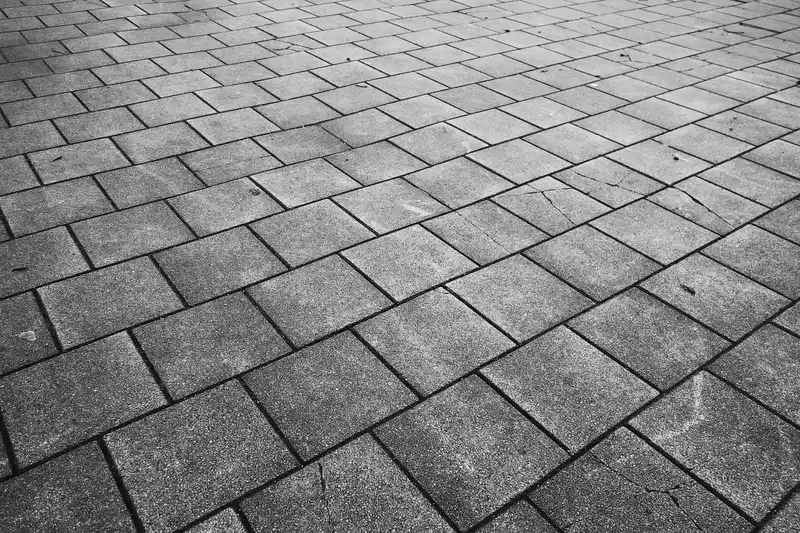
The common failures trace back to three mistakes: the slab moves, water gets trapped under the overlay, or the paver system does not match the slab and traffic load. Poured concrete is rigid. Pavers can be rigid or semi-flexible depending on the material. An overlay has to manage movement and drainage without blocking either one.
When that does not happen, the symptoms show up fast. Lippage, rocking edges, loose joints, cracking, white residue, and staining usually point to the same chain: poor slope, trapped moisture, or the wrong setting method for the material.
Common symptoms of a bad overlay
- Lippage: one paver edge sits higher than the next, usually from an uneven bed or a slab that is not flat enough.
- Cracking: movement from the slab or a blocked joint telegraphs into the overlay.
- Efflorescence: white mineral residue that is more likely when moisture stays under sand-set systems.
- Loose joints: sand washes out, shifts, or stays damp because drainage is weak.
- Rocking or hollow spots: the bed is too thick, too thin, or unsupported over a crack or low spot.
Say your patio slab is flat but has a shallow birdbath near the house. If the overlay does not restore slope away from the foundation, water will sit under the pavers and keep feeding the failure chain. The first sign may be a damp smell, then efflorescence, then loose joints after repeated wet and dry cycles.
Can pavers over concrete trap moisture?
Yes. That is the main risk in overlay work. Water can enter through joints, collect in low spots, move through a sealed or poorly drained slab, and stay under the pavers long enough to cause staining, efflorescence, and freeze-thaw damage. Some sand-over-concrete installations can cause efflorescence, and trapped water can worsen freeze-thaw problems. ASTM and ACI guidance both treat moisture control as critical because a wet assembly can become a durability problem long before the surface fails.
That risk rises when the slab slopes the wrong way, when control joints are blocked, or when the finish layer is too tight for moisture to escape. Rain is only part of it. Ground moisture, runoff from a nearby wall, and water that enters at the perimeter can all stay under the overlay if there is no escape path.
Where freeze-thaw cycles make it worse
Freeze-thaw cycles matter because trapped water expands when it freezes. In a closed overlay assembly, that pressure can loosen pavers, open joints, and push material out of the bed. If the slab already holds water, cold weather turns a drainage mistake into a structural one. That moisture-trap mechanism is the real problem: water gets in, cannot get out, and then expands or migrates through the bed and joints every time the temperature swings.
Picture a porch with a slightly sealed concrete surface and a few cut pavers set over sand. In warm weather it may look fine. After a hard freeze, the same trapped moisture can force the pavers upward at one edge and leave the joints uneven the next spring.
Concrete slab checklist
The slab has to pass a simple set of checks before any overlay goes on top of it. A good candidate is structurally sound, slopes away from the house, shows no major movement, and does not hold water in low areas. Some slab imperfections of plus or minus 3/8 inch over 10 feet may indicate a poor overlay base, and that tolerance is commonly used as a practical flatness screening point in hardscape work. For broader substrate evaluation, ACI concrete placement and repair references emphasize that active movement, delamination, or ponding are warning signs that should be corrected before overlaying.
Do not rely on appearance alone. Hairline cracks can be normal, but separation, heave, or differential movement means the slab is still active. A paver overlay cannot fix that movement. It usually copies it.
Pre-install pass/fail checks
- Slope: confirm the slab drains away from the foundation.
- Cracks: inspect for open cracks, offset edges, or widening lines.
- Separations: check where the slab meets a wall, step, or adjacent pad.
- Movement: any slab variation around +/- 3/8 inch over 10 feet is a warning sign for overlay use.
- Drainage: look for low spots, ponding, or blocked runoff paths.
- Surface soundness: the slab should be solid, not dusty, spalled, or crumbling at the top.
A slab that fails any movement or drainage check should be repaired, redesigned, or left alone. If it is actively cracking, heaving, or sloping toward the house, no overlay method is likely to keep it safe for long.
When to call a contractor
Bring in a contractor when the slab is out of slope, has active cracking or heave, needs drainage correction, or leaves too little height for a proper paver buildup at doors and thresholds. It is also the right call when the project needs a bonded assembly, a crack-bridging detail, or a transition that must be coordinated with adjacent hardscape, waterproofing, or wall flashing. If the base condition is uncertain, that decision is safer than trying to correct it with pavers.
Paver overlay risk table
This checklist table ties the slab condition to the material choice and the most likely failure mode. Use it before buying pavers, sand, mortar, or trim pieces.
| Slab condition | Material choice | Likely failure mode |
|---|---|---|
| Slab slopes away from the house, no ponding, movement within limit | Sand-set or mudset, depending on paver type | Low risk if joints and drainage are left open |
| Minor hairline cracks with no offset and a dry surface | Mudset with crack-bridging detail | Crack reflection or joint opening if movement continues |
| Visible separation, heave, or movement above +/- 3/8 inch over 10 feet | No overlay | Lippage, cracking, and broken bond lines |
| Low spots or ponding after rain | No overlay unless slope is corrected first | Trapped water, efflorescence, freeze-thaw damage |
| Dense or sealed slab with poor escape paths for water | Mudset or redesigned drainage detail | Moisture trap under the system |
| Cracks or control joints crossing the field | Geotextile bridge, then compatible overlay system | Blocked movement joint, uneven pavers, edge cracking |
Which setting method fits the slab?
The right method depends on the slab condition, the paver material, and how much water has to escape. Sand-set works only where drainage is managed and the material suits that method. Mudset and thinset are better when the overlay needs a tighter, thinner bond or when the paver type cannot tolerate a loose bed. If none of those options control movement and moisture, no overlay is the right answer. For the bedding-layer side of that choice, see bedding sand, and for bonded systems, compare the approach with mudset and thinset.
Sand-set over concrete
Bedding sand should be about 1 inch thick. It must be leveled and screeded, not left deep in one area and thin in another. Too much depth causes movement, and over concrete it can hold moisture if drainage is poor. This method also narrows material choices, because not every paver can sit in sand over a slab.
Some exterior tile systems use 2 cm-thick porcelain for sand-set installation, and marble is generally thicker at 3 cm for this application. Those thicknesses still have to match the installation method and traffic load. A porch that gets steady foot traffic is a different case from a light-use patio. Those thickness references should be checked against the manufacturer’s published installation limits and the relevant ASTM product requirements for the specific stone or porcelain paver being used.
Mudset and thinset methods
Mudset is thicker than thinset. Mudset is the correct bonded setting term for paver overlays; thinset is typically used for tile, not pavers. Mudset is used when a more controlled bed is needed to reduce lippage or support a stone or paver that should not float in sand. The choice matters because a bonded system handles movement differently from a sand bed.
A common mistake is to confuse mudset and thinset. They are not the same. If the slab has small height changes or a material that needs tighter support, a mudset detail can be safer than a loose sand bed. If the slab is moving or draining badly, neither method fixes the base problem.
When no overlay is the right answer
If the slab is out of slope, shows active movement, or cannot drain water away from the structure, stop there. Full replacement or structural repair is better than hiding the problem under pavers. This is also the right call when the planned material is too rigid, too thin, or too moisture-sensitive for the site.
Do pavers over concrete need joints or drainage?
Yes. They need both. Control joints and expansion joints in the slab can create drainage and movement issues, so the overlay must either bridge them correctly or leave a path for water to escape. If those joints get blocked, the system traps moisture and invites cracking, staining, and loose edges. That is why the joint detail matters as much as the paver choice.
Control joints, expansion joints, and geotextile
Non-woven geotextile is often used to bridge control joints and cracks while helping contain sand and still allowing drainage. The seams should overlap 12 inches. That detail helps keep bedding material from migrating into a crack while still giving the overlay a buffer zone. For the geotextile detail itself, compare this with the site’s geotextile guidance so the fabric weight and placement match the job.
Do not fill every joint solid if the slab still needs to move or drain. A hard cap over a live joint often creates a new crack line at the surface. If the slab needs movement, the overlay should respect it instead of locking it shut.
Weep paths and drainage openings
Where water can enter, it also needs a way out. At edges, around posts, and near slab joints, drainage openings or weep paths are often necessary so moisture does not sit under the pavers. That detail matters even more in freeze-thaw weather, because trapped water is the part that turns a moisture problem into a durability problem.
What problems happen when you put pavers over concrete?
The main problems are movement, lippage, cracking, moisture trapping, efflorescence, freeze-thaw damage, and drainage failure. Those failures usually start with a slab that is not sloped correctly, a bed that is too deep or too tight, or joints that block water instead of letting it move out of the system.
Concrete pavers can be two to three times stronger than typical poured concrete, but strength alone does not solve an overlay mistake. The slab still has to be sound, the material has to suit the installation method, and the finished assembly has to shed water. Otherwise the strongest unit in the system is still sitting on the wrong base. If white residue does appear after installation, the maintenance side is often handled separately through acid wash or commercial efflorescence remover rather than by forcing a new overlay detail.
Frequently asked questions
How do you tell if an existing concrete slab is good enough for pavers?
Use the same checks described above: slope, cracks, separations, movement, and drainage. If the slab drains away from the house, stays within the +/- 3/8 inch over 10 feet tolerance noted above, and has no active heave or ponding, it is a better candidate. If it fails those checks, the answer is usually repair first, overlay later.
How thick should overlay pavers be for a concrete patio or porch?
Use the thickness that matches the method, the load, and the manufacturer’s limits. As noted above, some exterior porcelain for sand-set work is 2 cm thick, while marble is generally 3 cm for this type of application. If the site needs a different buildup, go back to the earlier setting-method section instead of treating thickness as a stand-alone rule.
What base or bedding layer should go between pavers and concrete?
That depends on the system. Sand-set overlays use about 1 inch of bedding sand, while mudset and thinset systems use a bonded mortar bed instead. Too much sand depth creates movement, and over concrete it can also trap moisture if drainage is poor. If you need the long version, see the earlier setting-method section rather than repeating the same rule here.
Can you install pavers directly on concrete without sand or mortar?
No. Pavers should never be laid directly on concrete. Without a bedding or bonded setting layer, the system cannot level properly, joints are hard to control, and movement or drainage problems show up fast. Direct contact also raises the chance of rocking, edge damage, and water entrapment.
Will pavers over concrete crack in freeze-thaw weather?
They can, but the deciding factor is moisture, not just temperature. If water is trapped under the overlay, freeze-thaw cycling can lift pavers, open joints, and worsen cracking. The same moisture-trap mechanism described earlier is the key issue, so the fix is drainage and drying potential rather than repeating the freeze-thaw warning in isolation.
Which paver materials should not be installed over concrete in sand?
Materials that are too thin, too brittle, or too moisture-sensitive are poor fits for sand over concrete. Dense porcelain, marble, and some natural stone often need a specific thickness and a tighter setting method. If the slab drains poorly, a sand bed can make the moisture problem worse, which is why the earlier material-and-method section is the better reference point for the actual selection.