Stepping Stone Calculator: Spacing and Count Guide
A stepping stone calculator should start with one rule: set stone centers about 24 to 30 in apart for an average adult stride, then adjust for stone size, path width, and step length. Bad spacing makes a path feel awkward, pushes walkers into side steps, and often forces stone resets later. This guide covers spacing math, stone count for straight and curved paths, and a worked example you can copy.
How many stepping stones do I need?
The calculator estimates the number of stones needed for the full walking line, then rounds up so the layout does not run short. Start and end stones are usually included in the count, so the final number is based on total path length divided by center-to-center spacing, not stone width alone.
What the calculator counts
Count stones along the line a person will actually walk. For a simple straight path, that is the distance from the first stepping point to the last stepping point. For a curved path, it is the measured curve length. The calculator then applies a spacing rule and rounds up to the next whole stone.
Why the start and end stones matter
A path that begins with a stone and ends with a stone often needs one more stone than a rough visual estimate suggests. If the spacing works out to 5.2 intervals, rounding up to 6 intervals prevents an awkward last gap. That extra margin keeps the path usable after layout changes or small field adjustments.
How rounding up changes the final count
Use ceiling rounding, not regular rounding. If a roughly 20 ft path and 26 in spacing are used, the calculator would return about 10 stones. Rounding to 9 would stretch the spacing too far and can make the last step feel rushed or off cadence.
How far apart should stepping stones be?
A comfortable center-to-center spacing is often about 24 to 26 in for many adults, with a wider range used when stride length or site conditions call for adjustment. The right spacing depends on how far the person naturally steps, the stone size, and whether the path runs through lawn, mulch, or gravel.
How stride length affects spacing
Stride length is the biggest comfort variable. Shorter users often prefer spacing near 22 to 24 in center to center. Taller users may prefer 26 to 30 in. A practical way to estimate spacing is to use a natural walking step on level ground, then subtract a small allowance if the stones are large or the surface is soft.
Why stone size changes the gap
Stone size changes the edge-to-edge gap at any fixed center spacing. With 24 in center spacing and 12 in stones, the gap between edges is about 12 in. The same 24 in center spacing with 18 in stones leaves a 6 in gap. Larger stones reduce the visible gap and can make the path feel more stable.
When to adjust spacing for install conditions
Soft mulch, loose gravel, slope, and irregular stones often need a slight spacing adjustment. A path through mulch may benefit from tighter centers because footing can compress. A gravel path may need a more deliberate layout so the stones do not drift visually during installation or later settling.
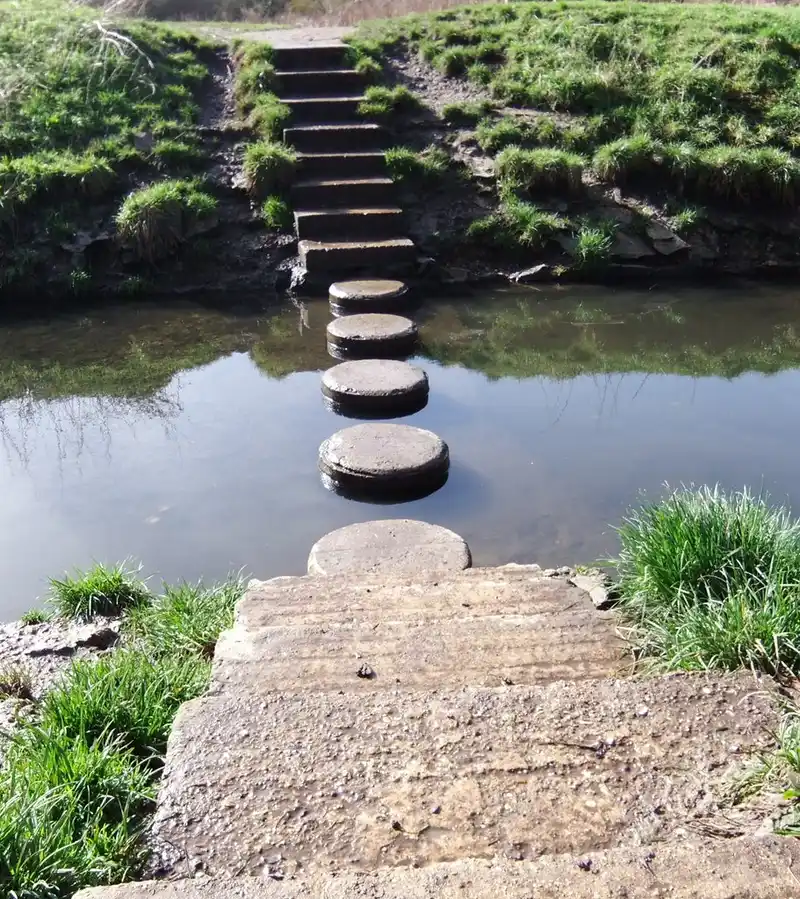
How do I measure path length for stepping stones?
Measure the full walking line in feet, then convert that length to inches for the spacing calculation. For straight paths, measure end to end. For curved paths, measure along the curve, because a straight-line distance undercounts the actual walk and leads to stones that land too far apart in use.
Straight paths versus curved paths
A straight path is simple: measure from the first stone center to the last stone center location. A curved path should be followed with a tape, a hose, or string laid where people will walk. The calculator should use that curve length, not the chord between endpoints.
Converting feet to inches for the calculation
Multiply path length in feet by 12. A 20 ft path is 240 in. If spacing is 26 in center to center, dividing 240 by 26 gives about 9.2 intervals. That number is then rounded up for the final stone count.
How irregular stone shapes affect measurement
Irregular or non-uniform stones should be measured by their effective tread width, not just a nominal size tag. Use the widest usable walking zone across the stone, then keep the centers consistent enough to preserve stride. This matters when a set includes mixed sizes or uneven outlines.
Stepping stone sizing and spacing table
This table shows how common stone sizes change the resulting gap and count for a 20 ft path. The center-to-center spacing stays tied to walkability, while the edge gap changes with stone size. That is why two paths with the same stride can look very different.
| Stone size | Recommended center-to-center spacing | Resulting gap between edges | Stones per 20 ft path | Install notes |
|---|---|---|---|---|
| 12 in | 24 in | 12 in | 11 | Good for tighter lawn routes; keep the surface flush and compact the base well. |
| 16 in | 25 in | 9 in | 10 | Works well for mulch or lawn; a moderate gap feels natural and is easy to place. |
| 18 in | 26 in | 8 in | 10 | Useful where a broader tread is preferred; watch mower clearance at the edges. |
| 24 in | 28 in | 4 in | 9 | Best for gravel or wide decorative paths; heavier stones need a firmer bedding layer. |
How to read the table
The center-to-center spacing is the number that controls comfort. The gap is only the remaining open space between stone edges. On a 20 ft path, larger stones often reduce the stone count because each tread covers more ground and needs less open gap to feel natural.
How to handle non-uniform sets
If a set mixes sizes, use the most common tread width as the reference and dry-fit the odd pieces where the path broadens, turns, or changes material. Do not force every stone into the same center spacing if one piece is much smaller or wider than the rest.
What base should go under stepping stones?
A stepping stone should sit on a compacted base or bedding layer, usually dense-graded pack or stone dust, with the finished top flush to slightly proud of grade. That helps keep the stone stable, reduces trip risk, and gives water a path to drain without leaving the tread sunken.
Bedding layer options
Dense-graded pack gives a firm, compactable setting bed. Stone dust is easier to fine-tune for level, but it still needs compaction. Either option works better than loose fill alone. The goal is a stable, even seat under each stone so the path does not rock or settle unevenly.
How much excavation and compaction to allow
Excavation depth depends on stone thickness and the bedding layer. Allow room for the stone, the bedding, and enough compacted base to keep the tread stable. In many DIY layouts, that means a shallow excavation followed by firm compaction before setting each stone to height.
Why height and drainage matter
Set stones flush or slightly proud of the surrounding surface. Too low invites puddling and mud. Too high creates a trip edge and can catch mower decks or trimming equipment. On lawn paths especially, a slight proud finish is common because surrounding turf can settle around the edges over time.
- Mark the walking line and measure the full path length.
- Choose a target center-to-center spacing based on stride and stone size.
- Convert the path length to inches.
- Divide path length by spacing.
- Round up to the next whole stone.
- Dry-fit the stones before digging or setting the base.
How the calculator works
The calculator uses path length, target center-to-center spacing, and stone size to estimate count and gap. The core rule is simple: spacing controls comfort, stone size controls the visible gap, and the path length controls how many intervals fit. Curves should be measured along the route, not across it.
Formula for spacing
Gap between edges = center-to-center spacing – stone size
Example: with 16 in stones and 25 in center spacing, the gap is 9 in. With 24 in stones and 28 in center spacing, the gap is 4 in. That is why bigger stones can make the path feel more continuous even when the stride spacing stays similar.
Formula for stone count
Stone count = ceiling(path length in inches ÷ center-to-center spacing)
This assumes a start stone and an end stone are part of the layout. If the calculation returns 9.23, round up to 10 stones. If the result lands exactly on a whole number, that whole number is the minimum practical count for the chosen spacing.
Worked example for a 20 ft path
A 20 ft path is 240 in long. If the target spacing is 26 in center to center, the count is 240 ÷ 26 = 9.23. Round up to 10 stones. If the stones are 16 in wide, the gap is 26 – 16 = 10 in. That is a comfortable layout for many average strides.
Field-check before digging
Dry-fit the layout with tape, marking paint, or temporary markers before excavation. Step through it in normal shoes and check whether the spacing matches the walking line. Small changes at this stage are far easier than moving set stones later, especially on curved paths or mixed-surface routes.
Frequently asked questions
How many stepping stones do I need for my path?
Use the full walking-line length, convert it to inches, divide by the center-to-center spacing, and round up. The result is the stone count. This method includes the start and end stones, so it is better than estimating by eye or by path width alone.
How far apart should stepping stones be spaced?
A common comfortable range is about 24 to 26 in center to center for many adults. Shorter strides may prefer slightly tighter spacing, while longer strides may need more. Stone size and surface type can shift the best number a few inches in either direction.
What is the center-to-center spacing for stepping stones?
Center-to-center spacing is the distance from the middle of one stone to the middle of the next. It is the most useful spacing number because it ties directly to stride and count. Edge-to-edge gap matters too, but it changes with stone size and should not be the only measure.
How do I calculate stepping stone gap size?
Subtract stone width from the center-to-center spacing. For a 25 in center spacing and a 16 in stone, the gap is 9 in. For a 28 in center spacing and a 24 in stone, the gap is 4 in. This keeps the walking rhythm clear.
How many stepping stones fit in a 20-foot path?
A 20 ft path is 240 in long. At 24 in spacing, that is 10 stones. At 25 in spacing, it is 9.6 intervals, so the count rounds up to 10 stones. At 26 in spacing, it is 9.23 intervals, which also rounds up to 10 stones.
How do I estimate stepping stones for a curved path?
Measure the curve along the actual walking line, not as a straight end-to-end distance. Then apply the same spacing formula and round up. Dry-fit the stones first, because curves often need small adjustments to keep the step rhythm even through bends and slope changes.